Arduino magnet wire wrapping assitant

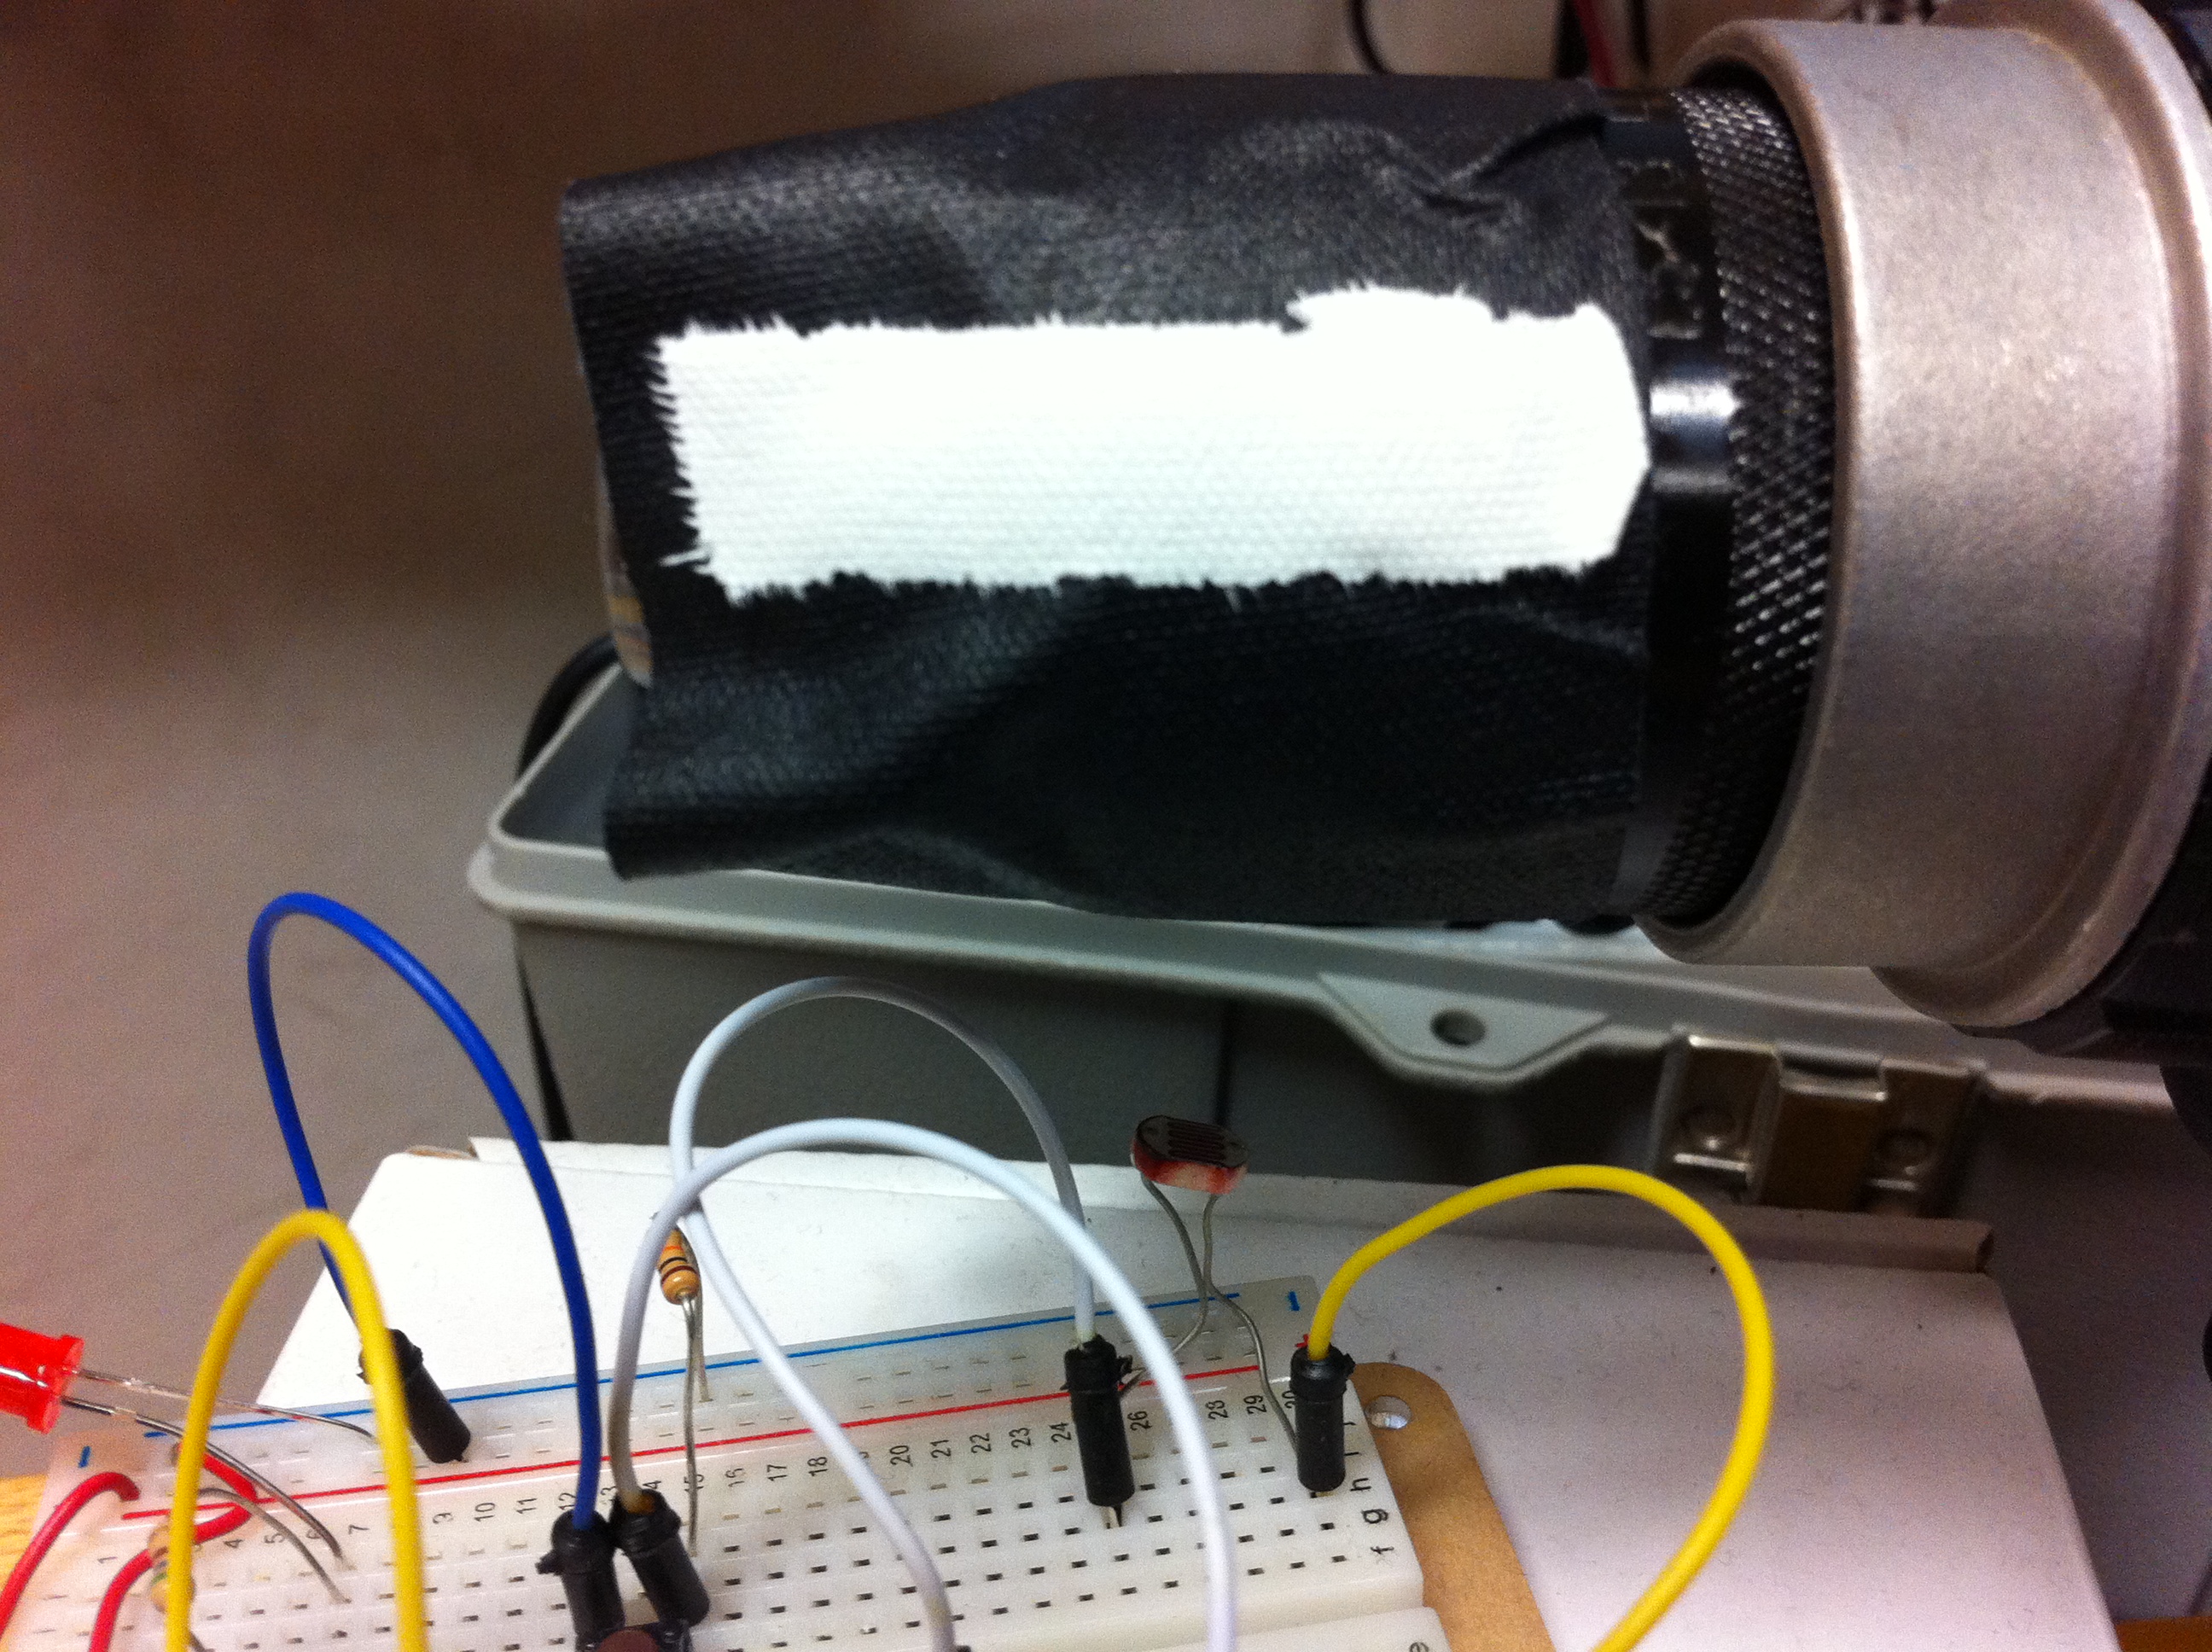
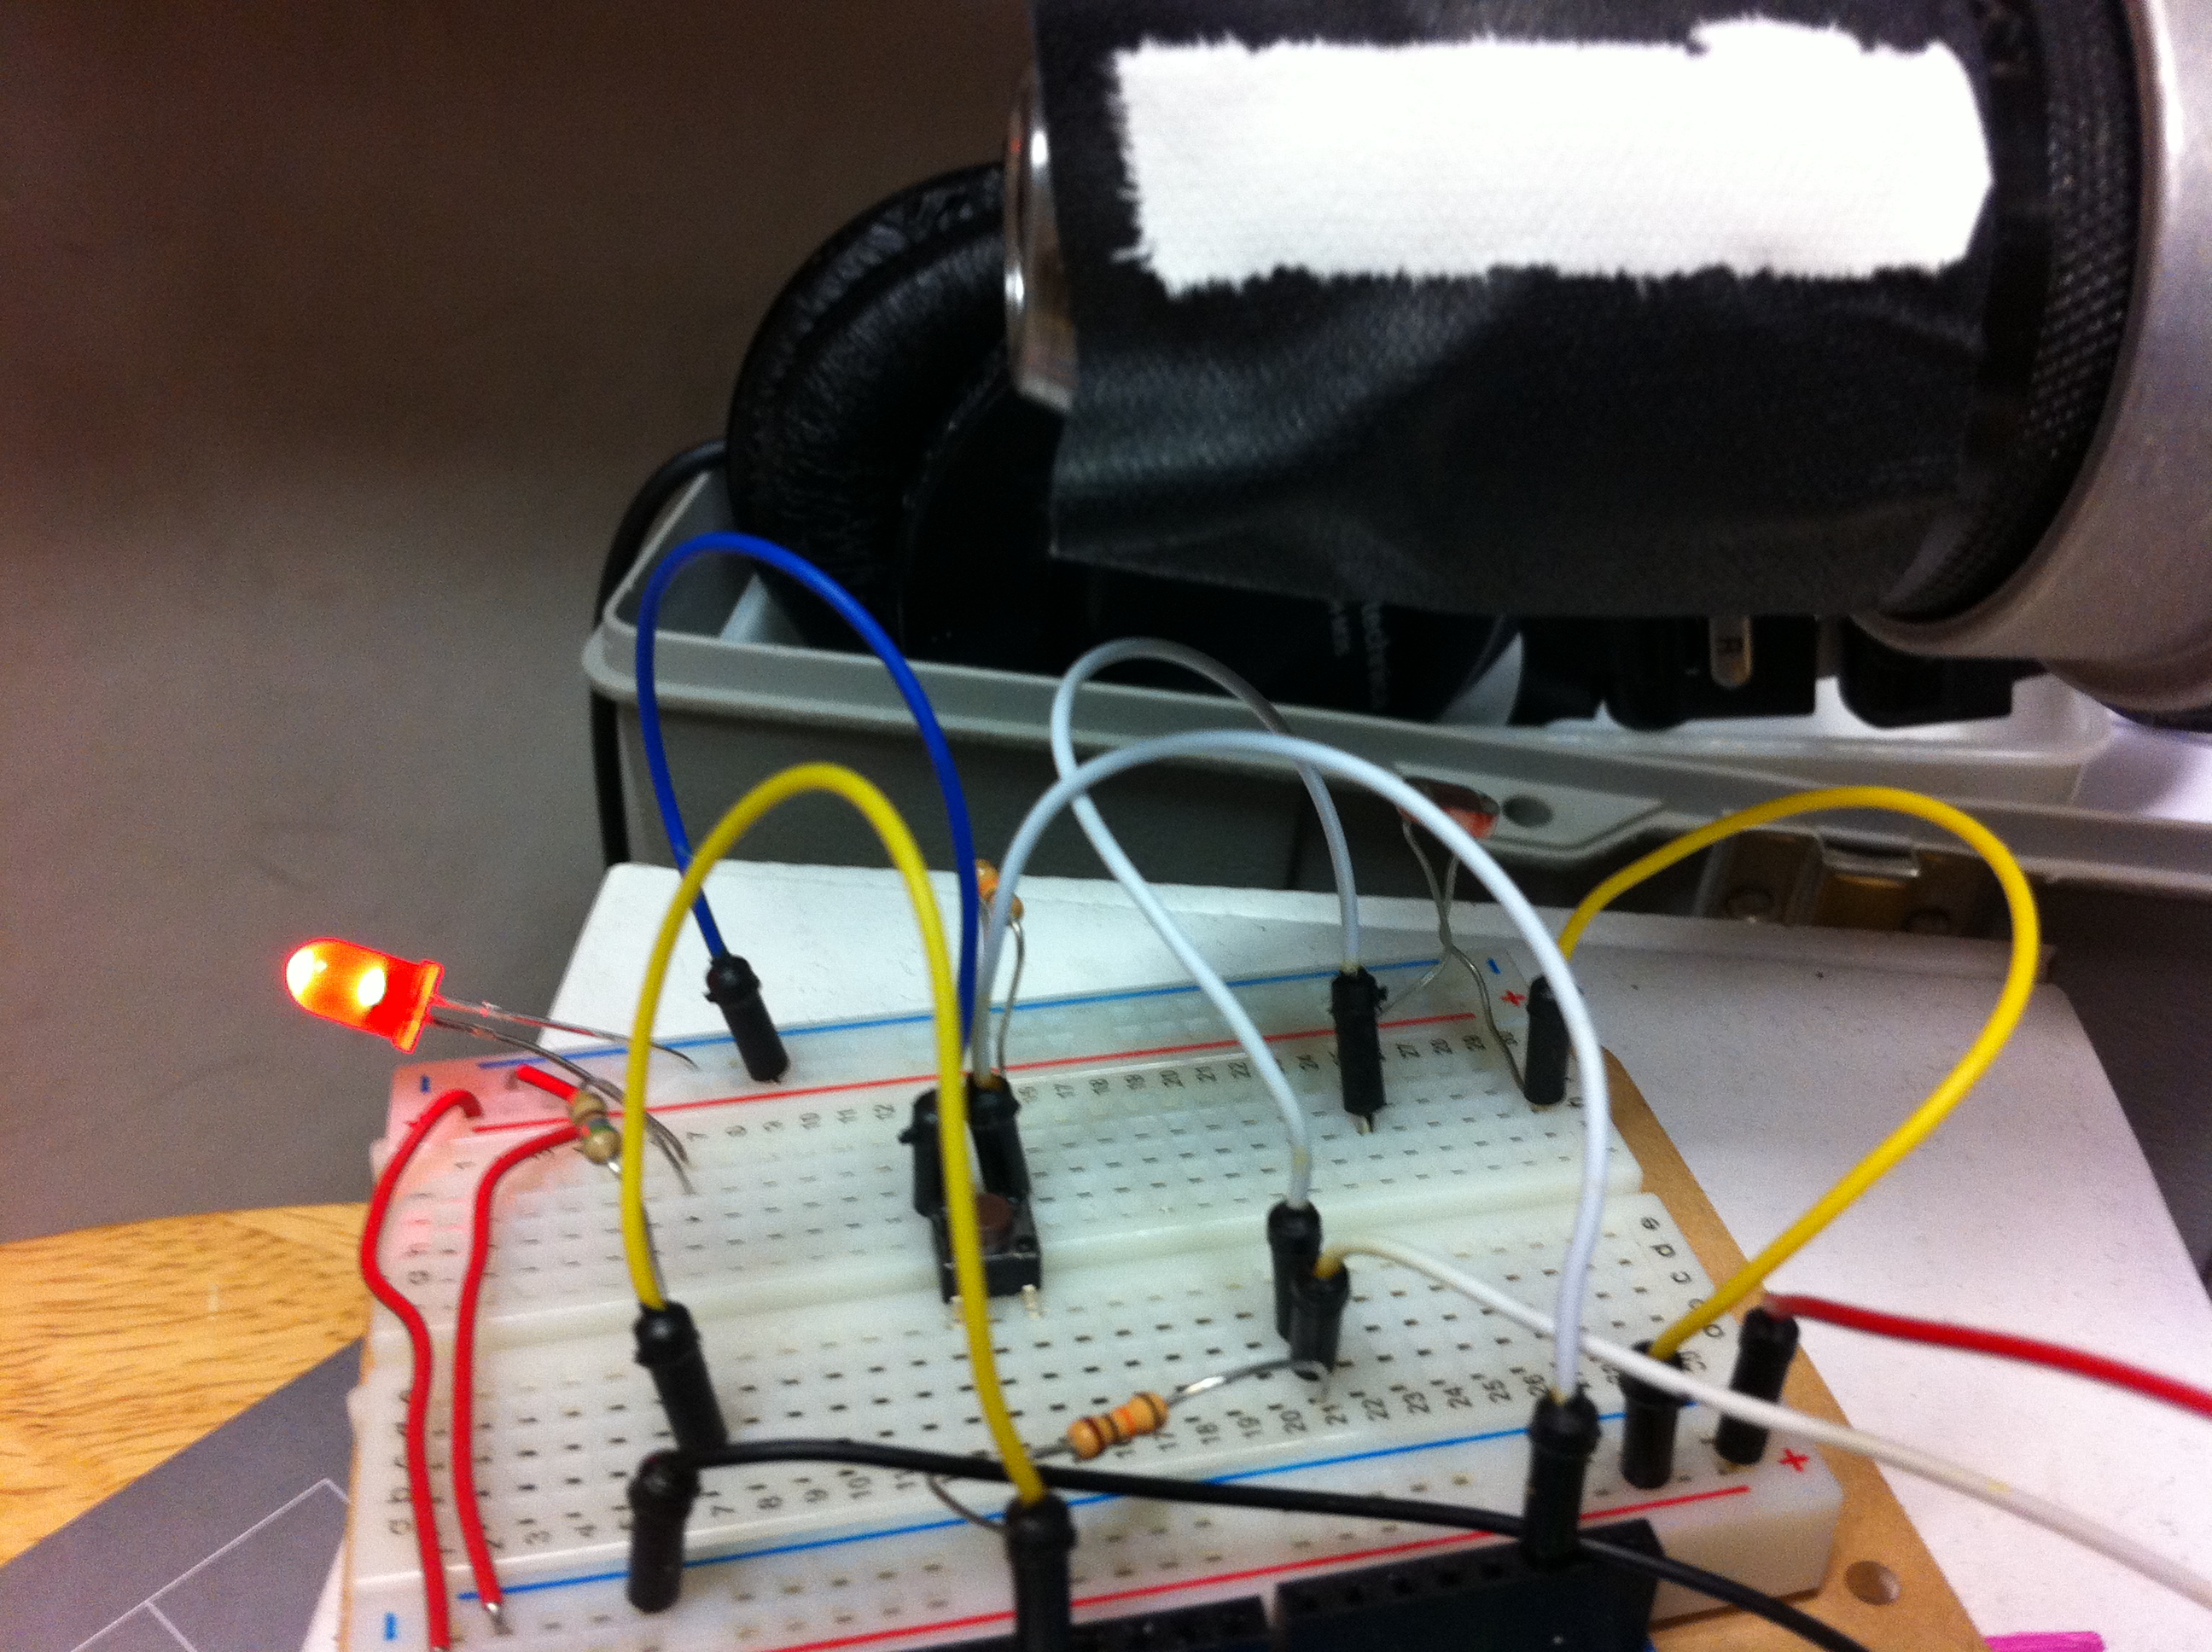
I’m wrapping my own magnetic coils for a project I’m working on and I need to wrap each coil 600 times. To help keep track of the count I made an assistant out of an Arduino and a photo resistor. In this test I wrap black tape around the chuck on a drill and then put a strip of white tape over it. Shining a light from underneath reflects off the white strip as it rotates and shines more brightly into the photocell. The Arduino uses this change in brightness to count how many rotations the drill makes and when it gets to the right amount an LED turns on. In the video example the light turns on after 10 rotations. Code is included below.

IMG_2432

IMG_2436

IMG_2437

Moshi Moshi (aka wife alert)

I have a hard time getting in touch with my wife. Usually when I call, the phone is in the other room or switched on vibrate and she hardly ever picks up. I decided to try a little more earnestly to get her attention (this may end up being really good, or really bad). I set out making what I call Moshi Moshi (Japanese for ‘hello’ on the telephone). Now, whenever I call her, our house is filled with a warm embrace of music. She also gets an email letting her know I’m trying to reach her. We’ll see how it works out…

I used Asterisk, Ruby, Sinatra, and an Arduino Due with an ethernet shield to make Moshi Moshi. When I call Kiori a Ruby script makes a post request to a Sinatra app that logs the call in a yaml file, and sends an email to her letting her know I’m calling. Every 10 seconds the Arduino is polling a web page served from the Sinatra app, which pulls data from the yaml file. If a new call comes in, a music file I created is played in our apartment from the Due (which can play audio files). There is a button on the hardware interface she can press to mute it.

moshi moshi (wife alert)
more photos

One of the challenging parts was actually getting the audio file to play more than once on the Due (seems like it should be simple right?). I discovered if I set the pre buffering to 0 (the examples set it to 100) then it worked fine: Audio.begin(88200, 0);

Code:
Continue reading

Glockentar

The Glockentar combines a glockenspiel with a guitar.

guitarGlockenspiel
Glockentar

Each time a string is plucked a glockenspiel bell is struck with a solenoid, and a beam of light is projected across the length of the string.

Glockentar

Glockentar

The light follows a logarithmic curve in terms of it’s speed as it goes up and down the string. It starts fast, pauses for a moment then goes back down the string.

The lights are essentially rectangles made in openFrameworks, then sent to MadMapper via Syphon.

In MadMapper they are then mapped to the strings.

Glockentar

An Arduino is used to turn the strings into switches. Each string acts as a ground, and electricity is sent to the pick. When a string is plucked with the pick the switch is closed and the solenoids and projections are triggered.

Glockentar

Here is the Arduino code:

Here is the OF code: